Face recognition based alarm for taking breaks
A Raspberry Pi Open CV based system for face recognition application
Our next goal is to add face tracking to the camera and make it warn the user when they are sitting in the same place for a long time. We have been spending long hours in from of our work stations at home due to the lockdown and before we know it, we forget to take sufficient breaks. As numerous articles recommend, it is highly recommended to take breaks while working in the same posture for a long time. This utility will be especially useful in detecting this and warning the user to take a break 🙂
Let’s get started with instructions provided in https://www.hackster.io/mjrobot/automatic-vision-object-tracking-5575c4
Right off the bat, a really important factor to consider is the size of the SD card. I would strongly recommend using a card of minimum 16GB size, before attempting to compile and install openCV packages on it. A 8GB card simply does not cut it, as I have learned the hard way, having to copy over my entire Raspbian installation from a 8GB card to a 16GB card, midway. There are multiple guides on the internet about how to clone a SD card to a larger card, and it is a fairly straight forward procedure. If there is sufficient interest, maybe I can cover it on one of the future posts.
Setting up your Raspberry Pi OpenCV
The next step is actually installing open CV on the Raspberrry Pi. This was one of the most challenging part of the project. When we search for Open CV on Raspberry Pi, we can see tons of resources on the internet. Unfortunately, depending on the guide you follow, and setup you have, there is a good chance that the installation will fail. There are multiple moving parts in the Open CV builds system, which tends to impact the builds. Some of the items which make the online guides ineffective are changes in the base OS, either Raspbian or the x86 OS you might using for cross compiling the packages, the open CV version being used, the python version being used, the dependent tools and libraries being used. Any of these components changes, and the build might break and figuring out the fix is a task with no end. A better approach is to look for a solution relevant to the versions of software component that you are using. I was using Raspbian Buster. Luckily for us, Adrian Rosebrock, who maintains https://www.pyimagesearch.com/, actually does a very good job of posting up to date procedures of installing Open CV on various versions of Raspberry Pi software. I followed his instructions provided in https://www.pyimagesearch.com/2019/09/16/install-opencv-4-on-raspberry-pi-4-and-raspbian-buster/, and was able to finally emerge from the rabbit hole called Open CV installation. I can only hope that things will become better over time, as Open CV stabilizes.
The below screenshot shows the final compilation screen of Open CV on my Raspberry Pi.
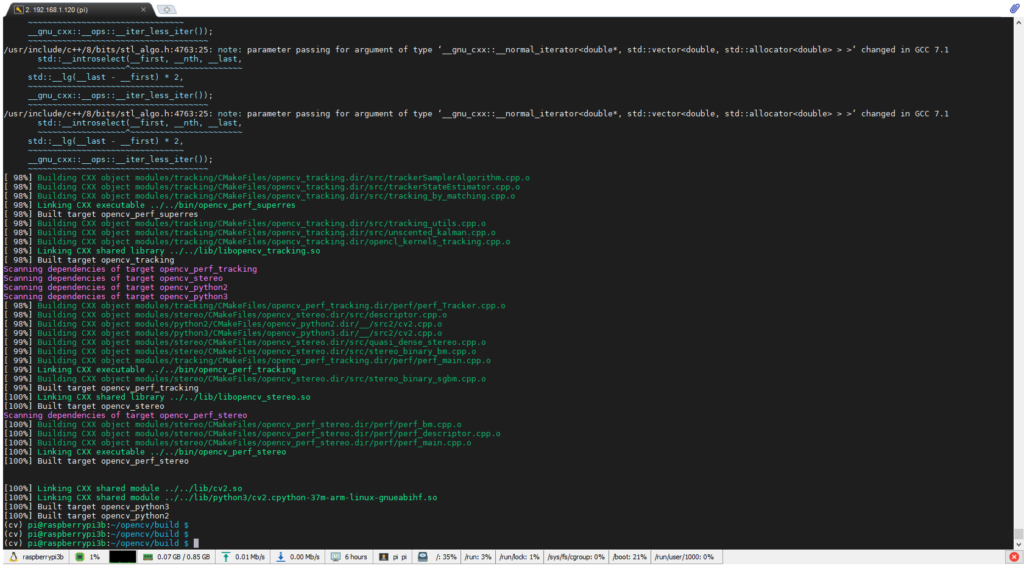
We shall now fall back the to the instructions provided by Marcelo Rovai here https://www.hackster.io/mjrobot/automatic-vision-object-tracking-5575c4
Make sure the Raspberry Pi is equipped with a camera and enable the interface support.
$ sudo raspi-config

Navigate to the Pi Camera option and make sure you select Enable. Save and quit.

You can test the camera with the following utility:
$ raspistill -o image.jpg
Write the following lines of code to a file test_camera.py and run it using the Python IDE to test your Open CV interfacing with the camera.
import numpy as np
import cv2
cap = cv2.VideoCapture(0)

while(True):
    ret, frame = cap.read()
    frame = cv2.flip(frame, -1) # Flip camera vertically
    gray = cv2.cvtColor(frame, cv2.COLOR_BGR2GRAY)
    cv2.imshow('frame', frame)
    cv2.imshow('gray', gray)

    if cv2.waitKey(1) & 0xFF == ord('q'):
        break
cap.release()
cv2.destroyAllWindows()
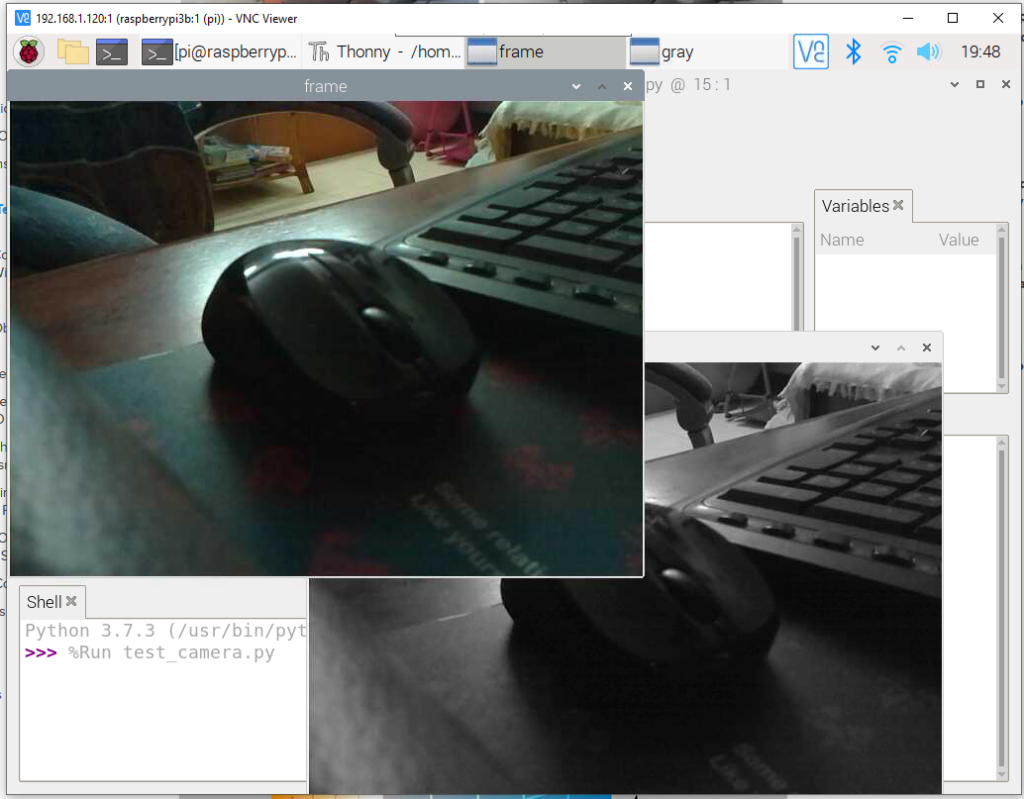
It will show both color and grayscale image of the camera view.
Creating a training data set
We will start by creating a training dataset. A dataset is a collection of images that help train our model to recognize faces with their names. In this case the training dataset will be a collection of images of the user, i.e me. I have decided to capture 100 images for the training, and try to change the angle of my face to the camera during the capture.
Create a folder called face_recognition
$mkdir face_recognition

$mkdir datatset

$mkdir Cascades
Download the haar cascades from here https://github.com/Itseez/opencv/tree/master/data/haarcascades to the Cascades directory. You can read more about Cascade classifier training here https://docs.opencv.org/3.3.0/dc/d88/tutorial_traincascade.html
Create the following file:
$ cat face_dataset.py
import cv2
import os

cam = cv2.VideoCapture(0)
cam.set(3, 640) # set video width
cam.set(4, 480) # set video height

face_detector = cv2.CascadeClassifier('Cascades/haarcascade_frontalface_default.xml')
# For each person, enter one numeric face id
face_id = input('\n enter user id end press <return> ==>  ')
print("\n [INFO] Initializing face capture. Look the camera and wait ...")

# Initialize individual sampling face count
count = 0

while(True):
    print("\n [INFO] Scanning #", count)
    ret, img = cam.read()
    img = cv2.flip(img, -1) # flip video image vertically
    gray = cv2.cvtColor(img, cv2.COLOR_BGR2GRAY)
    faces = face_detector.detectMultiScale(gray, 1.3, 5)

    for (x,y,w,h) in faces:
        cv2.rectangle(img, (x,y), (x+w,y+h), (255,0,0), 2)
        count += 1
        # Save the captured image into the datasets folder
        cv2.imwrite("dataset/User." + str(face_id) + '.' + str(count) + ".jpg", gray[y:y+h,x:x+w])
        cv2.imshow('image', img)
    k = cv2.waitKey(100) & 0xff # Press 'ESC' for exiting video

    if k == 27:
        break

    elif count >= 100: # Take 30 face sample and stop video
         break

# Do a bit of cleanup
print("\n [INFO] Exiting Program and cleanup stuff")
cam.release()
cv2.destroyAllWindows()
After running the script, we will end up with a data set of 100 images with our face

Creating a trainer
Next, we need to train the recognizer. The recognizer maps the person to a user in the data base. Our intent here is to identify the valid user and track their presence. This is done by analysing the images in the dataset.
We use specific OpenCV functions to achieve this.
Lets create a folder called ‘training’
$ mkdir trainingCopy the following code to face_training.py.
Some of the older guides may have the attribute
cv2.face.createLBPHFaceRecognizer()
In newer versions of OpenCV, this has been changed to cv2.face.createLBPHFaceRecognizer()
You can see all the options by using in the python console:
>>> print(help(cv2.face))I also found that recognizer.write(‘training/trainer.yml’) had to be replaced with recognizer.save(‘training/trainer.yml’) in the original script written by Marcelo.
$ cat face_training.py
import cv2
import numpy as np
from PIL import Image
import os

# Path for face image database
path = 'dataset'
recognizer = cv2.face.createLBPHFaceRecognizer()
detector = cv2.CascadeClassifier("Cascades/haarcascade_frontalface_default.xml");

# function to get the images and label data
def getImagesAndLabels(path):
    imagePaths = [os.path.join(path,f) for f in os.listdir(path)]
    faceSamples=[]
    ids = []
    for imagePath in imagePaths:
        PIL_img = Image.open(imagePath).convert('L') # convert it to grayscale
        img_numpy = np.array(PIL_img,'uint8')
        id = int(os.path.split(imagePath)[-1].split(".")[1])
        faces = detector.detectMultiScale(img_numpy)

        for (x,y,w,h) in faces:
            faceSamples.append(img_numpy[y:y+h,x:x+w])
            ids.append(id)
    return faceSamples,ids

print ("\n [INFO] Training faces. It will take a few seconds. Wait ...")
faces,ids = getImagesAndLabels(path)
recognizer.train(faces, np.array(ids))

# Save the model into trainer/trainer.yml
recognizer.save('training/trainer.yml') # recognizer.save() worked on Mac, but not on Pi

# Print the numer of faces trained and end program
print("\n [INFO] {0} faces trained. Exiting Program".format(len(np.unique(ids))))
This script will produce the training YAML here:
$ ls -ltr training/

total 3456

-rw-r--r-- 1 pi pi 3537029 May  9 19:28 trainer.yml
Creating a recognizer
The recognizer actually maps the user in the video feed is mapped to a known user in the data base. Run the following script:
$ cat face_training.py
import cv2
import numpy as np
from PIL import Image
import os

# Path for face image database
path = 'dataset'
recognizer = cv2.face.createLBPHFaceRecognizer()
detector = cv2.CascadeClassifier("Cascades/haarcascade_frontalface_default.xml");

# function to get the images and label data
def getImagesAndLabels(path):
    imagePaths = [os.path.join(path,f) for f in os.listdir(path)]
    faceSamples=[]
    ids = []

    for imagePath in imagePaths:
        PIL_img = Image.open(imagePath).convert('L') # convert it to grayscale
        img_numpy = np.array(PIL_img,'uint8')
        id = int(os.path.split(imagePath)[-1].split(".")[1])
        faces = detector.detectMultiScale(img_numpy)

        for (x,y,w,h) in faces:
            faceSamples.append(img_numpy[y:y+h,x:x+w])
            ids.append(id)
    return faceSamples,ids

print ("\n [INFO] Training faces. It will take a few seconds. Wait ...")
faces,ids = getImagesAndLabels(path)
recognizer.train(faces, np.array(ids))

# Save the model into trainer/trainer.yml
recognizer.save('training/trainer.yml') # recognizer.save() worked on Mac, but not on Pi

# Print the numer of faces trained and end program
print("\n [INFO] {0} faces trained. Exiting Program".format(len(np.unique(ids))))

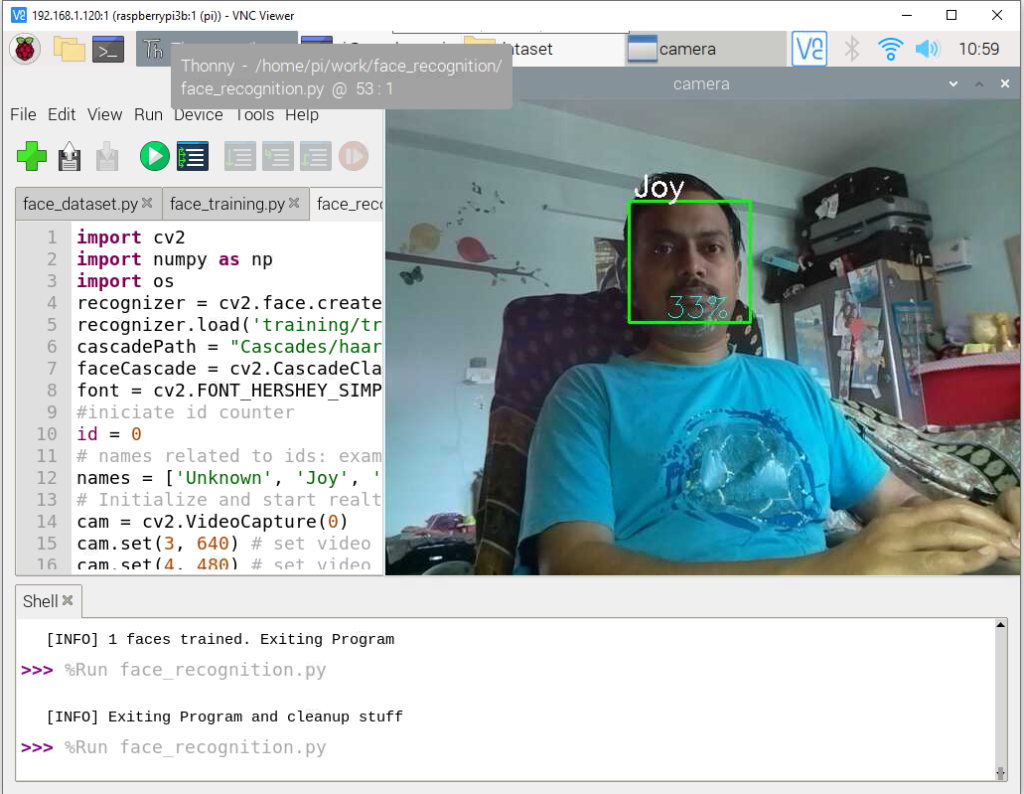
You should start seeing the face recognition start to work
Creating a logger for the user face
We will try to create an application that tracks the face and monitors the duration it is in the view. If it exceeds more than 5 mins, it warns the user by blinking a light and making an audio alarm.
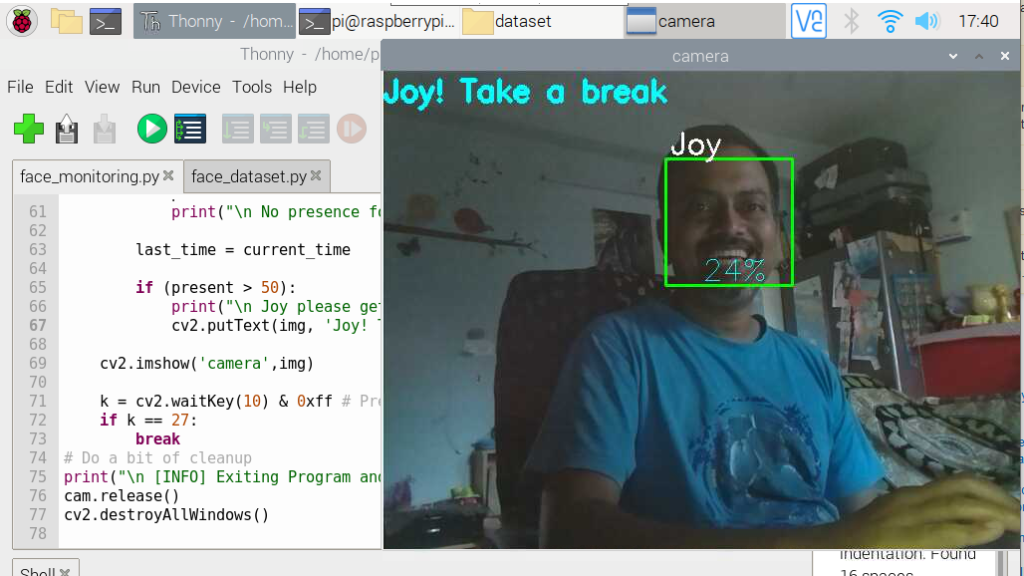
We have mapped the LED to GPIO21 (pin 40) on Raspberry Pi. You can refer to the post http://boseonthe.rocks/raspberry-pi-based-robot-part-1/ to understand more on mapping GPIOs to the GPIO wire APIs.
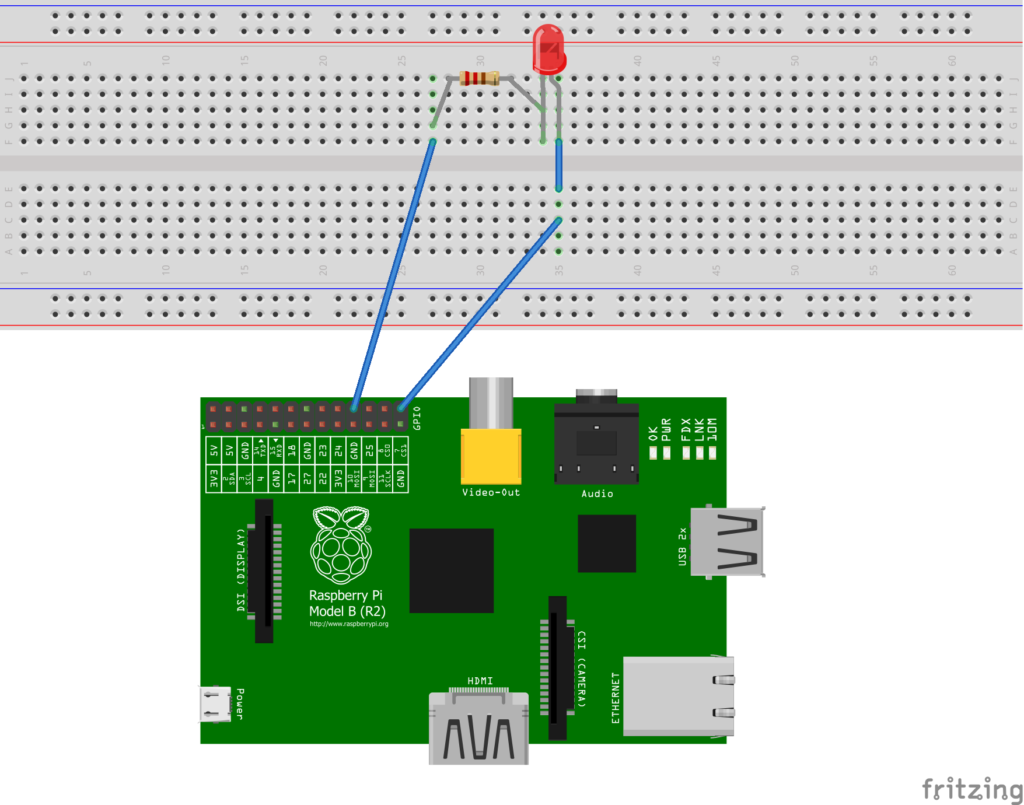
Run the below code to check out the operation. You can change line testing the value 50 to adjust the amount of time the script needs to wait before raising an alert.
$ cat face_monitoring.py
import cv2
import numpy as np
import os
import time
import RPi.GPIO as GPIO    # Import Raspberry Pi GPIO library
from time import sleep     # Import the sleep function from the time module
import threading

recognizer = cv2.face.createLBPHFaceRecognizer()
recognizer.load('training/trainer.yml')
cascadePath = "Cascades/haarcascade_frontalface_default.xml"
faceCascade = cv2.CascadeClassifier(cascadePath);
font = cv2.FONT_HERSHEY_SIMPLEX

#initiate counters
id = 0
present = 0
last_time=0
current_time=0
# set LED GPIO
warnLed = 21
GPIO.setmode(GPIO.BCM)
GPIO.setwarnings(False)
GPIO.setup(warnLed, GPIO.OUT)
GPIO.output(warnLed, GPIO.LOW)
#ledOn = False
ledState="off"

def flashLed(e, t):
    """flash the LED every second"""
    while not e.isSet():
        time.sleep(1)
        if(ledState=="on"):
            GPIO.output(warnLed, GPIO.HIGH) #switch off the LED
            time.sleep(1)
            GPIO.output(warnLed, GPIO.LOW)
        if(ledState=="off"):
            GPIO.output(warnLed, GPIO.LOW)
            time.sleep(.1)

e = threading.Event()
t = threading.Thread(name='non-block', target=flashLed, args=(e, 2))
t.start()

# names related to ids: example ==> Joy: id=1,  etc
names = ['Unknown', 'Joy', 'Z', 'W']
# Initialize and start realtime video capture
cam = cv2.VideoCapture(0)
cam.set(3, 640) # set video widht
cam.set(4, 480) # set video height

# Define min window size to be recognized as a face
minW = 0.1*cam.get(3)
minH = 0.1*cam.get(4)

while True:
    ret, img =cam.read()
    img = cv2.flip(img, -1) # Flip vertically
    gray = cv2.cvtColor(img,cv2.COLOR_BGR2GRAY)
    faces = faceCascade.detectMultiScale(
        gray,
        scaleFactor = 1.2,
        minNeighbors = 5,
        minSize = (int(minW), int(minH)),
       )

    for(x,y,w,h) in faces:
        cv2.rectangle(img, (x,y), (x+w,y+h), (0,255,0), 2)
        id, confidence = recognizer.predict(gray[y:y+h,x:x+w])

        # Check if confidence is less them 100 ==> "0" is perfect match
        if (confidence < 100):
            id = names[id]
            confidence = "  {0}%".format(round(100 - confidence))
            current_time = time.time()

        else:
            id = "unknown"
            confidence = "  {0}%".format(round(100 - confidence))
            present = 0

        cv2.putText(img, str(id), (x+5,y-5), font, 1, (255,255,255), 2)
        cv2.putText(img, str(confidence), (x+5,y+h-5), font, 1, (255,255,0), 1)

        if ((current_time-last_time) < 10):  # wait 10 secs before increasing count
                present += 1

        else:
            present = 0
            print("\n Good job! So you took a break :)")
            ledState = "off" #switch off the LED
        last_time = current_time

        if (present > 50): # Time to wait before creating alarm
            print("\n Take a break!")
            cv2.putText(img, 'Take a break', (1,30), font, 1, (255,255,0), 3)
            ledState = "on"

    cv2.imshow('camera',img)
    k = cv2.waitKey(10) & 0xff # Press 'ESC' for exiting video
    if k == 27:
        break

# Do a bit of cleanup
print("\n [INFO] Exiting Program and cleanup stuff")
"""exit the blinking thread"""
e.set()
"""turn  off the LED"""
GPIO.output(warnLed, GPIO.LOW)
cam.release()
cv2.destroyAllWindows()
A quick explanation of what we are doing here: The script creates a thread that is responsible for either blinking the LED with 1 sec time period, or to completely switch it off. We send the notification to the thread using global variables (not really the best practice, but good enough for out purposes). Since Python threads explicitly dont die, we use the event mechanism to exit the while condition. The main thread continues to execute and analyse the camera feed for the user id 1. When it detects the user is getting detected for more than 50 iterations, it creates a alert on the screen and starts blinking the LED, prompting the use to take a break.
Here is what my Raspberry Pi setup looks like.
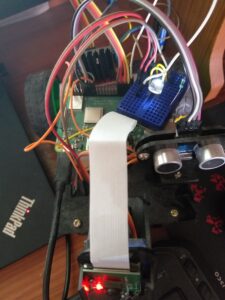
Here is a GIF to demonstrate the behavior of the application:
Do let me know what you think about this post !